

The world of artificial intelligence has moved rapidly from generating static pixels to orchestrating dynamic, cinematic motion. If you have spent any time crafting the perfect prompt in an AI image generator, you already know the thrill of seeing your imagination come to life. But the next logical step—breathing life into those still frames—often feels trapped behind expensive paywalls, aggressive credit systems, and intrusive branding. Check out the Best info about free ai image to video generator no restrictions.
As a creator, you are likely searching for a true free ai image to video generator that doesn’t limit your creative potential. The good news? The landscape is shifting. From open-source breakthroughs to clever cloud-based workarounds, there are now reliable ways to achieve unlimited ai video generation from images. You can Check uncensoredai.video.
In this comprehensive guide, we will explore the best free AI image-to-video generators with no restrictions. We will dive deep into local installations, compare the heavyweights of the cloud generation world, and provide actionable workflows so you can start creating stunning, dynamic content today.
The Evolution of the AI Video Maker
Not too long ago, creating video from text or images required massive server farms and exclusive access to beta programs. Today, the technology has been democratized. An AI video maker analyzes your static image, understands the depth, lighting, and subject matter, and uses latent diffusion models to predict and generate subsequent frames, creating the illusion of smooth motion.
However, the commercialization of these tools has led to steep subscription fees. Most mainstream generators offer a handful of free credits, slap a massive watermark on your output, and ask for a monthly fee. This makes finding ai video tools with no credit limits incredibly valuable for indie filmmakers, digital artists, and content creators who need room to experiment without watching a countdown meter.
Let’s break down how you can bypass these limitations, starting with cloud-based options and moving into the ultimate unrestricted frontier: local open-source models.
Cloud-Based Generators: Free Tiers, Alternatives, and Workarounds
While true “no restriction” tools usually require a local installation on a powerful PC, several cloud platforms offer generous free tiers, daily credit resets, or open-access spaces.
Cloud-Based Image to Video Generators Without Signup
If you want to test the waters without handing over your email address or linking your Discord account, Hugging Face is your best friend. Hugging Face hosts countless open-source models in “Spaces” built by the community.
You can easily find implementations of various video diffusion models hosted here. Because these are community-run, they act as brilliant cloud based image to video generators without signup.
How to use Hugging Face Spaces for Video:
- Navigate to HuggingFace.co and click on the “Spaces” tab.
- In the search bar, type “Image to Video” or “Stable Video Diffusion.”
- You will find multiple Gradio web interfaces hosted for free.
- Upload your image, adjust the motion bucket ID (which controls the amount of movement), and click generate.
Note: Because these are free community servers, generation times can be slow during peak hours. However, they cost absolutely nothing and rarely feature watermarks.
Runway Gen-2 vs Pika Labs for Beginners
When discussing accessible video generation, two giants dominate the conversation: Runway and Pika. If you are just starting out, you will likely test both. Here is a breakdown of Runway Gen-2 vs Pika Labs for beginners.
Runway Gen-2:
- The Vibe: Cinematic, hyper-realistic, and highly controlled.
- Ease of Use: Exceptional. Runway offers a sleek web interface.
- Key Feature: The “Motion Brush.” You can paint over specific parts of your image (like water or clouds) and tell the AI to only animate those areas.
- The Catch: Runway is notorious for its strict credit system. While you get free credits upon signing up, they do not replenish quickly, making it restrictive for heavy users.
Pika Labs (Pika.art):
- The Vibe: Stylized, anime-friendly, and highly dynamic.
- Ease of Use: Originally Discord-only, Pika now has a beautiful web interface. It is incredibly intuitive.
- Key Feature: Lip-syncing and region modification (inpainting for video).
- The Catch: Pika gives you 30 initial free credits, which replenish at a rate of 30 per day. While not strictly “unlimited,” this daily reset makes it much more forgiving than Runway for hobbyists.
The Verdict: If you want granular control over a single masterpiece, use Runway. If you want to experiment daily and prefer a platform that replenishes your ability to create, Pika is the better beginner choice.
Top Pika Labs Alternatives for Video Generation
If you burn through your Pika or Runway credits, where do you go? Here are the top Pika Labs alternatives for video generation that offer generous free usage:
- Haiper AI: A newer contender that has taken the AI community by storm. As of its current iteration, Haiper offers exceptionally generous free generation capabilities. It excels at complex physics and character consistency.
- Luma Dream Machine: Luma’s entry into the video space allows for incredible, high-fidelity video generation. While they have introduced paid tiers, their free tier provides a substantial amount of daily generations, often outperforming older models in realism.
- Kling AI: Initially limited to the Asian market, Kling has opened its doors globally. It provides a generous daily free credit allowance and is currently one of the most powerful tools for maintaining structural integrity during heavy motion.
Leonardo AI Motion Tool Review
No discussion of AI artistry is complete without mentioning Leonardo AI. Originally a powerhouse for static image generation, they recently integrated a video feature.
In our Leonardo AI motion tool review, the standout feature is the seamless integration. You don’t need to download your image and upload it elsewhere. Once you generate a stunning image in Leonardo, a single click on the “Generate Motion” button (often represented by a small video camera icon) turns it into a short MP4.
- Pros: Incredible convenience, utilizes Leonardo’s proprietary high-quality base images, and offers a sliding scale for motion intensity.
- Cons: It costs “tokens” (Leonardo’s currency). However, because Leonardo provides 150 free tokens every single day, it functionally acts as an ongoing free tool, provided you manage your daily allowance wisely. The motion can sometimes be a bit “wobbly” compared to Runway, but for subtle animations (hair blowing, water rippling), it is fantastic.
Going Open Source: The Path to Zero Restrictions
If you are serious about figuring out how to animate photos for free without watermarks and want completely unlimited ai video generation from images, you must leave the cloud behind and embrace local open-source software.
By running models on your own hardware, you bypass all credit systems, censorship filters, and paywalls. The only cost is your electricity.
The Best Open Source Image to Video Models
Currently, the community is focused on two primary architectures for local video generation:
- Stable Video Diffusion (SVD): Developed by Stability AI, SVD is the gold standard for turning a single image into a short, highly realistic 2 to 4-second video clip. It excels at cinematic pans and natural physics.
- AnimateDiff: Rather than just predicting frames from an image, AnimateDiff uses a “motion module” injected into standard Stable Diffusion text-to-image models. It is unparalleled for longer animations, heavy stylization (like anime or 3D rendering), and evolving latent spaces.
Below, we will provide comprehensive tutorials for setting up and mastering both.
Stable Video Diffusion Local Installation Guide
To run Stable Video Diffusion locally, you will need a relatively modern Nvidia GPU (ideally with 8GB of VRAM or more, though 12GB+ is recommended for higher resolutions). The easiest and most visual way to run SVD is through ComfyUI, a node-based graphical user interface for Stable Diffusion.
Here is your step-by-step Stable Video Diffusion local installation guide:
Step 1: Install ComfyUI
- Go to the official ComfyUI GitHub repository.
- Scroll down to the “Installing” section and download the direct standalone release for Windows.
- Extract the .7z file using a program like 7-Zip to a drive with plenty of space (at least 20-30GB).
- Inside the extracted folder, double-click run_nvidia_gpu.bat to launch the interface in your web browser.
Step 2: Download the SVD Models
You need the actual AI models to make it work.
- Create a free account on Hugging Face.
- Search for “Stable Video Diffusion XT” (the XT model generates 25 frames, whereas the base model generates 14).
- Download the svd_xt.safetensors file.
- Move this file into your ComfyUI directory under ComfyUI\models\checkpoints.
Step 3: Set Up the Workflow
- ComfyUI uses visual “workflows.” Instead of building one from scratch, you can drag and drop an existing workflow image into the browser window.
- Search online for “ComfyUI SVD basic workflow JSON.” Save the image or file and drag it into your ComfyUI interface.
- The nodes will automatically populate.
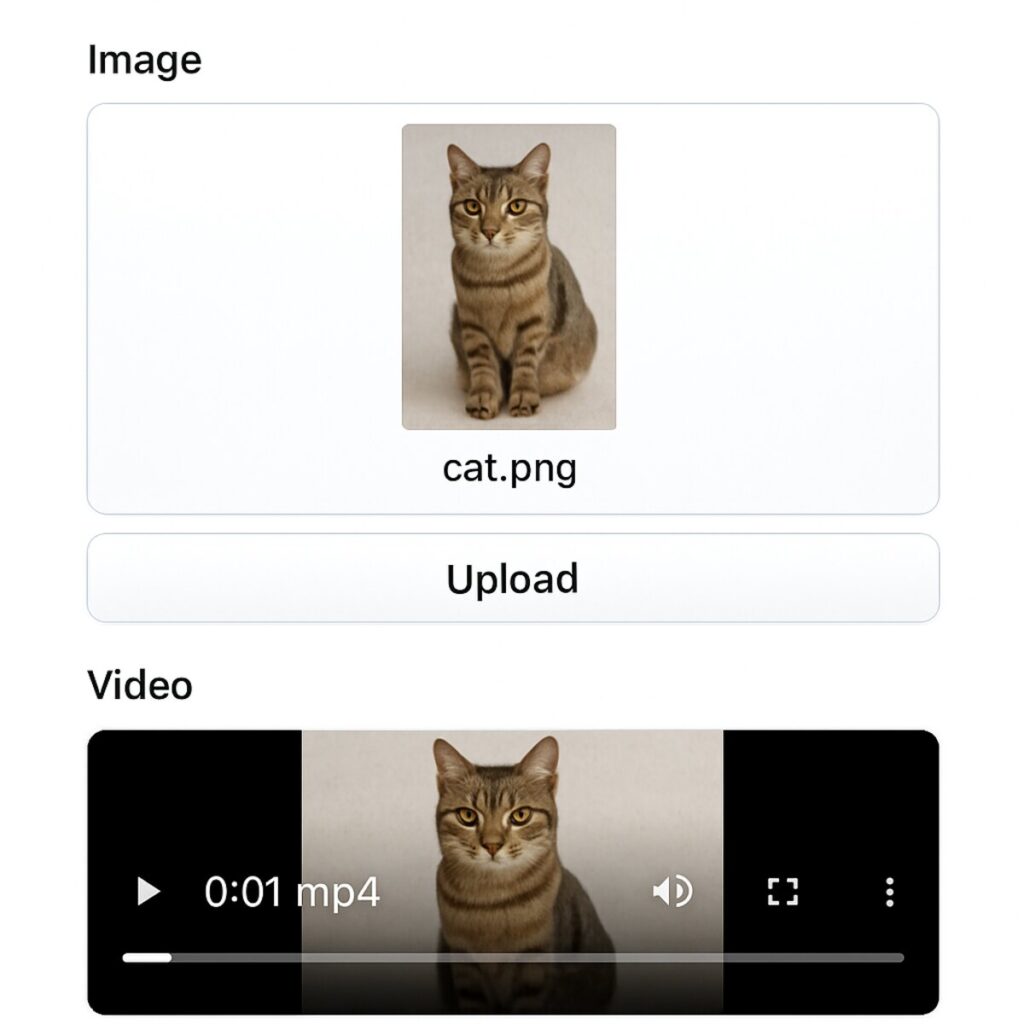
- On the left side of the workflow, locate the “Load Image” node. Upload your static image here.
- Hit “Queue Prompt” on the right-side menu.
Your GPU will now begin calculating. Within a few minutes (depending on your hardware), a completely free, watermark-less video will appear in the output node, ready to be saved to your hard drive. You now have your very own unlimited AI video maker.
AnimateDiff WebUI Extension Tutorial
If you prefer the classic Automatic1111 Stable Diffusion WebUI over ComfyUI, AnimateDiff is your best option. AnimateDiff is brilliant for stylized animations and looping GIFs.
Here is a straightforward AnimateDiff WebUI extension tutorial to get you animating in minutes.
Step 1: Install the Extension
- Launch your Automatic1111 Stable Diffusion WebUI.
- Navigate to the Extensions tab at the top.
- Click on the Install from URL sub-tab.
- Paste the URL for the sd-webui-animatediff GitHub repository (you can easily find this by searching “AnimateDiff Automatic1111 GitHub”).
- Click Install. Once it finishes, go to the Installed tab, click Apply and restart UI.
Step 2: Download Motion Modules
AnimateDiff requires “motion modules” to understand movement.
- Go to Hugging Face or Civitai and search for “AnimateDiff v3 motion module” or “mm_sd15_v3.safetensors”.
- Download the file and place it in this specific folder: stable-diffusion-webui\extensions\sd-webui-animatediff\model.
Step 3: Generating Your First Animation
- Restart your WebUI. You will now see an “AnimateDiff” drop-down menu on your main txt2img or img2img page.
- Expand the AnimateDiff menu and check the “Enable AnimateDiff” box.
- Select the motion module you just downloaded from the drop-down list.
- Set the Number of frames (usually 16 or 24).
- Set your frames per second (FPS) to 8 or 12.
- Check “Closed loop” if you want a seamlessly looping GIF.
- Enter your prompt (e.g., “A beautiful landscape, clouds moving, water flowing”).
- Hit Generate!
AnimateDiff will now hijack the standard image generation process, forcing the latent noise to evolve consistently over your chosen number of frames. You have just achieved ai video tools with no credit limits, completely offline.
Mastering the Art of AI Video Creation
Having the tools is only half the battle. To truly “Create Stunning Videos from Images Free,” you need to know how to pilot these generators. From controlling the camera to ensuring the final output looks crisp on a 4K monitor, technique is everything.
How to Use Camera Controls in AI Video Generators
Static subjects in a moving frame are the hallmark of cinematic video. Learning how to use camera controls in ai video generators separates amateur outputs from professional ones.
Most tools (like Runway, Pika, and advanced ComfyUI workflows) use standardized terminology for camera movement:
- Pan (Left/Right): Moves the camera horizontally. Excellent for wide landscape shots or revealing a new subject.
- Tilt (Up/Down): Moves the camera vertically. Perfect for establishing the scale of tall buildings or giant characters.
- Zoom (In/Out): Pushes the camera toward or away from the subject. Zooming in creates intimacy or tension. Zooming out establishes isolation or reveals the environment.
- Roll (Clockwise/Counter-Clockwise): Rotates the camera. Use sparingly; it can easily induce motion sickness, but works well for dream sequences or action shots.
Actionable Tip: If you are using text prompts to guide your image-to-video generation (like in Pika Labs), use syntax like: -camera zoom in or -camera pan right. If you are using open-source tools like Stable Video Diffusion, look for “Motion Bucket ID” settings. A lower motion bucket (e.g., 40) will keep the camera relatively still, while a higher one (e.g., 120) will force aggressive camera sweeps and subject movement.
High Resolution Image to Video Conversion Tips
One of the most frustrating aspects of free or open-source AI video is the resolution. Most models output natively at 1024×576 or even 512×512 to save on VRAM and compute time. If you upload these directly to YouTube or Instagram, they will look muddy.
Here are expert high resolution image to video conversion tips to get crisp, HD outputs:
- Start with a High-Res Image: AI video models degrade the quality of your initial image slightly. Always start with an image that is upscaled and sharp.
- Use an AI Video Upscaler: Do not just stretch the video in Premiere Pro. You need an AI to reconstruct the pixels.
- Free/Local Option: Topaz Video AI (Paid, but the industry standard) or Video2X (a fantastic free, open-source alternative based on Waifu2x and Anime4K).
- ComfyUI Option: You can build a workflow in ComfyUI that passes every frame of your generated video through an ESRGAN upscaler node before combining it back into an MP4. This takes time but yields incredibly sharp results for free.
- Frame Interpolation: Upscaling resolution is important, but upscaling the framerate is equally vital. If your video is a choppy 8 frames per second (FPS), use a tool like RIFE (Real-Time Intermediate Flow Estimation) to artificially generate the missing frames, smoothing it out to a buttery 24 or 60 FPS.
Troubleshooting Advanced Issues
As you dive deeper into these unrestricted tools, you will encounter the inherent flaws of current generative AI. The most glaring of these are flickering and warping.
How to Fix Flickering in AI Generated Videos
Flickering occurs because the AI generates each frame slightly differently. It might decide a shadow belongs on a face in frame 1, remove it in frame 2, and bring it back in frame 3. This micro-stutter is a dead giveaway of AI generation.
Here is how to fix flickering in ai generated videos:
- Deflicker Software: In post-production, professional software like DaVinci Resolve (which has a free version) includes a “Deflicker” effect. Dropping this onto your AI video clip and setting it to “Fluoro Light” or “Time Lapse” can forcefully smooth out luminance changes.
- ControlNet (For Local Users): If you are using AnimateDiff locally, you can use a ControlNet model called Tile or Lineart. By running your base image through ControlNet across all frames, you force the AI to respect the original edges and colors of the first image, drastically reducing texture flickering.
- Lower the Denoising Strength: If your tool allows you to adjust the “denoising” or “motion strength” (often seen in img2img workflows), lower it. A denoising strength of 0.8 will hallucinate wild, flickering details. Lowering it to 0.4 keeps the video closer to the original image, ensuring stability.
Temporal Consistency in Image to Video Workflows
Flickering is a micro-issue; temporal consistency is a macro-issue. Temporal consistency refers to an object remaining structurally identical throughout the entire video. (e.g., The AI shouldn’t turn a coffee cup into a kitten halfway through the pan).
To maintain temporal consistency in image to video workflows:
- Keep Prompts Simple: When transitioning from image to video, do not overwhelm the AI with new prompt instructions. If your initial image is “a man in a suit,” your video prompt should just be “a man in a suit walking.” Do not add “cyberpunk city, neon lights, 4k” to the video prompt if it wasn’t in the image prompt. The AI will try to introduce those elements mid-video, destroying consistency.
- Shorter is Sweeter: The longer an AI video runs, the more it degrades. The current sweet spot for temporal consistency is 2 to 4 seconds. Generate a short, perfect clip, and use traditional video editing to cut to a new scene, just like a real movie.
Summary: Best Free AI Animation Tools for Creators
To wrap up, let’s categorize the best free ai animation tools for creators so you can choose the exact software for your specific needs:
- For the Absolute Beginner: Pika Labs or Haiper AI. Generous daily credits, text-to-video, image-to-video, and no software installation required.
- For the UI-Focused Professional: Leonardo AI. Beautiful interface, excellent base images, and a highly integrated daily free token system.
- For the Unrestricted Cloud User: Hugging Face Spaces. Zero signups, zero limits, but you will have to wait in queues.
- For the Unrestricted Local Pro: Stable Video Diffusion (via ComfyUI). The absolute best for photorealism and camera control with no limitations.
- For the Stylized Animator: AnimateDiff (via Automatic1111). Unmatched for anime, 3D rendering, and looping GIF creation.
Conclusion
The dream of an unrestricted AI video maker is no longer a distant sci-fi concept. While the big corporate platforms will always try to lock the best features behind subscription models and watermarks, the open-source community and clever cloud alternatives ensure that your creativity doesn’t have an expiration date.
By utilizing the free AI image-to-video generators with no restrictions discussed in this guide, you can bypass the tollbooths of modern AI generation. Whether you are using daily reset credits on Pika, experimenting with Hugging Face spaces, or taking the plunge into a Stable Video Diffusion local installation, you now have the knowledge to animate photos for free without watermarks.
Remember, the key to great AI video isn’t just clicking a button; it is mastering camera controls, utilizing high-resolution upscaling, and ensuring temporal consistency. So fire up your GPU or load up your browser, drop in your best generated image, and start creating stunning, cinematic motion today. The only limit left is your imagination.